Showing posts with label lessons. Show all posts

Wednesday, January 23, 2019

Lesson 15 – Final Speeches (continued)

Thank you for being a good class! I enjoyed teaching you. I hope to see you on campus next school year. Please say hi!


Also, remember, you can add me as a friend or follow me by clicking the links below:


GTB on Facebook



GTB on Twitter



GTB on Instagram

Wednesday, January 16, 2019

Lesson 14 – Final Speeches (part 1)

Final Speech Feedback Forms
For each speaker, give feedback using the form link below.


Wednesday, January 9, 2019

Lesson 13 – The Conclusion

The Introduction & The Body Practice
We practiced The Introduction and The Body parts of our speech with our classmates. We gave and received feedback using the handouts.

The Conclusion
We looked at the Speaking of Speech textbook and learned about The Conclusion.

Use the past tense to remind us what you told us in the overview slide using the future tense. Also, include one focus point (the best example or number).

For your conclusion slide, you can copy and paste your overview slide. It is OK to include your focus points on your slide. However, try to use fewer words on the slide than what you say. Also, animate each main point and focus point separately. If you would like a challenge, don't write your focus points on your slide. Instead, remember them and say them.

In addition to the focus point for each point of your conclusion, I suggest a final focus point. You can introduce your final focus point with these words …

If you remember only one thing from my presentation, please remember that …

After that, show your title slide and finish with Thank you! (do not say "I'm finished.").


This is a powerful way to end your conclusion.


Introduction and Conclusion Practice

We gave our introductions and conclusions with our partners and gave and received feedback. Use this feedback to make improve your presentations.

PUNCH

Presentation expert Garr Reynolds has written on his blog and his book The Naked Presenter about starting your presentations well. He says this is necessary because of the primacy effect, that is, how what people hear at the beginning has the biggest impact on how effective your presentation will be.

Read more about PUNCH on his blog:
PUNCH on the Presentation Zen Blog


Make your ending sticky
Here are some suggestions for making your ending sticky. Being sticky means that your ideas will stick and be easy to remember. The idea comes from a book by Chip and Dan Heath, Made to Stick. Garr Reynolds in his book The Naked Presenter refers to their ideas when suggesting how to finish your presentation strong.
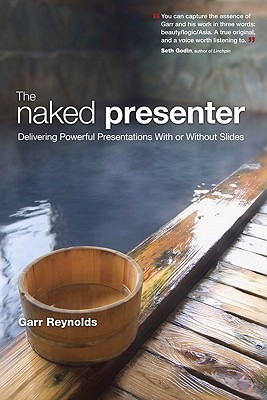
Here is a summary of the points Reynolds shares from the Heaths' book:
  • Simplicity – do not add much new information at the end of your talk.
  • Unexpectedness – just as your PUNCH can include something unexpected, your ending can as well. In fact, you begin an anecdote or a question in your introduction and give the conclusion here.
  • Concreteness – Avoid being abstract. Give a specific example or use a specific image to make your final point.
  • Credibility – Use a final example or statistic to make your final point.
  • Emotions – Find a way to make your audience care about your final point. This can be similar to the Personal part of PUNCH.
  • Stories – Use a story to help your audience remember your talk. People like stories.

Just like with PUNCH, you probably cannot use each of these ideas. But, consider using one or more.

If these techniques are too challenging, you don't need to use them. However, everyone should finish your presentations strong. Remember, you can introduce your final focus point with these words …


Final Presentations
Next week some of you will give your final speech. Everyone should be ready.


Continue building your Final SpeechPractice, practice, practice. Practice makes perfect.

Wednesday, December 19, 2018

Lesson 12 – The Body

The Body
We looked at the Speaking of Speech textbook and learned about the The Body. Next lesson you will give The Introduction and The Body sections of your final speech. 


Next Lesson (1/9)
You will give your The Introduction and The Body parts of your final speech next week. 

Continue building your Final Speech
  • Prepare slides for your main points.
  • You will have three main points.
  • Each main point should have evidence. Use both numbers and examples.
  • Each main point should have transitions to the next point. Use both past and future and statement and rhetorical question patterns.
  • Use previous skills (posture, eye contact, voice inflection, CRAP, IEE, etc…). You should plan AND practice these.
  • Practice the introduction and body of your speech several times to be smooth.

If it helps you, you can download and print the storyboard handout.
Storyboard Handout

If you were absent, you can also download the Final Presentation Guide.
Final Presentation Guide

Wednesday, December 12, 2018

Lesson 11 – The Story Message: Introduction

The Introduction
We looked at the Speaking of Speech textbook and learned about the The Introduction. We gave speeches about our favorite restaurant.


Next Lesson (12/19)
You will give your The Introduction part of your final speech next week. 
  • Choose two or three products to compare. You will tell us why one product is the best choice.
  • Prepare three slides: What, Why, and Overview
  • Use expressions from the Glossary of Introductory Phrases (p. 63)
  • Practice the introduction of your speech several times to be smooth.

Wednesday, December 5, 2018

Lesson 10 – Comparison Speeches (continued)

Comparison Speeches (continued)
We saw the rest of our classmates' comparison speeches.

Next week we will start on the Story Message.

Wednesday, November 28, 2018

Week 9 – Comparison Speeches

Comparison Speech Feedback Forms
For each speaker, give feedback using the form link below.

Feedback Form
  1. Posture
    Did the speaker do each step (feet, hands, look, and voice)? Did they do them in order? Did they pause between steps?
  2. Eye contact
    Did the speaker look at individuals for about 3 seconds? Did the speaker look at you?
  3. Gestures
    Did the speaker make a gesture for each slide? Was the gesture clear? Was the gesture useful? How was the timing?
  4. Voice inflection
    Did the speaker change their voice for important points? If it wasn't clear to you, you cannot give a "5".
  5. Effective Visuals
    Did the speaker use the CRAP principles well?
    Did the speaker use "bleeding" (full-size images)?
    Did the speaker use large fonts?
  6. Explaining VisualsDid the speaker use I. E. E.* for each graph?
  7. Overall performance
I. E. E.* = introduce, explain, emphasize

Wednesday, November 21, 2018

Lesson 8 – Explaining Visuals

Explaining Visuals
After looking at our graphs, we watched the two presentations on the DVD for Explaining Visuals. We also learned about I.E.E. (introduce, explain, emphasize) from the textbook (pp. 54-55)


Next Lesson (11/28)
You will give your Comparison Speech next week. 
  • Review the CRAP principles and use them in your slides and be ready for the quiz.
  • Use 3 graph or chart slides.
  • Use 2 or more image (photographs or illustrations)
  • Include a title slide and repeat it at the end of your presentation.
  • The title slide should have your title and your name and class information.
  • You should use I. E. E. for each data slide.
  • Plan gestures and voice inflection as well.

Wednesday, November 7, 2018

Lesson 6 – Demonstration Speeches (continued)

Today we continued to hear and give feedback on your classmates' Demonstration Speeches

Next week we will begin to look at the Visual Message.

Wednesday, October 31, 2018

Lesson 5 – Demonstration Speech

Demonstration Speech Feedback Forms
For each speaker, give feedback using the form link below.

Demonstration Speech Feedback Form


  1. Posture
    Did the speaker do each step (feet, hands, look, and voice)? Did they do them in order? Did they pause between steps?
  2. Eye contact
    Did the speaker look at individuals for about 3 seconds? Did the speaker look at you?
  3. Gestures
    Did the speaker make a gesture for each slide? Was the gesture clear? Was the gesture useful? How was the timing?
  4. Voice inflection
    Did the speaker change their voice for important points? If it wasn't clear to you, you cannot give a "5".
  5. Warnings
    Did the speaker give a warning for each step?
  6. Cooking vocabulary
    Did the speaker use a variety of cooking words from the handout?
  7. Overall performance

Tuesday, October 23, 2018

Lesson 4 – Gestures and Voice Inflection

Gestures
In this lesson, we learned about the importance of gestures in the physical message. We also practiced using different gestures and the timing of gestures.


Voice Inflection
We also looked at the Speaking of Speech textbook and learned about the voice inflection and about bad postures to avoid. Finally, we looked at a model Demonstration Speech on the DVD. Next week you will give an Demonstration Speech about how to make your favorite dish. 


Demonstration Speech Presentation
Use the storyboard handout from class to prepare the steps for your Demonstration Speech.

Your speech will have six steps. For each step, you will have …
  1. a full sized photograph.
  2. an instruction.
  3. a warning.
  4. a gesture.
  5. one or more voice inflections.

Your slideshow should also have a title slide and a final slide with your presentation title and your name. To make the final slide, make a copy of your title slide.

Do not use small images. Fill the slide!

    Your slides should be photographs from your camera or phone. Use full size images. You can only use text to label your ingredients.

    There is a 3-minute time limit for your presentation. Be sure to practice many times with your gestures and voice inflection! Watch the DVD again for a good example.


    If you need the handouts, you can download them from the links below.

    Cooking Vocabulary Glossary
    Demonstration Speech Preparation Handout

    Wednesday, October 17, 2018

    Lesson 03 – Informative Speeches

    Informative Speeches
    You will give your Informative Speech to small groups and give feedback using Google Forms.

    Informative Speech Feedback Forms
    For each speaker, give feedback using the form link below.

    Feedback Form

    Here are some things to consider when giving feedback:

    Posture:

    1. Feet
      Does the speaker set their feet properly? For men, shoulder-width apart and pointing straight forward. For women, feet pointing out in each direction with one foot a little in front of the other.
    2. Hands
      Does the speaker pause before setting hands? Does the speaker set their hands properly? One hand should rest in the "hook" of the other hand's fingers.
    3. Look
      Does the speaker pause before beginning to look? Does the speaker look from one side of the room to the other and back to the middle? Does the speaker look slowly?
    4. Voice
      Does the speaker pause before beginning to speak? Does the speaker take a breath? Does the speaker use a loud enough voice?
    5. Parts
      Does the speaker introduce the topic? Does the speaker talk about each of see, do, eat, getting around? Does the speaker review the points at the end?
    6. Images
      Are the images interesting? Are the images full size? Do the images suit the message?
    7. Eye contact
      Does the speaker make eye contact with individuals? Did the speaker make eye contact with you? Does the speaker keep eye contact for about 3 seconds or one sentence?

    Wednesday, October 10, 2018

    Lesson 2 – Eye Contact

    Eye Contact Practice
    In this lesson, we practiced eye contact during the speech and watched a demo of our next speech.


    Speaking of Speech
    We looked at a model Informative Speech on the DVD. Next week you will give an Informative Speech about your hometown or any city. 



    Presentation Slides
    You have only three choices for software for most presentations:

    1. Apple Keynote
    2. Microsoft Powerpoint
    3. Google Slides

    Do not use Libre Office. Keynote is the best choice, but if you don't want to spend money, I recommend Google Slides. 

    However, for next week's presentation, you MUST use Google Slides


    Next Week
    You need to share your slides with me before you come to class next week.
    1. Go to Google Drive.
    2. From the New button on the top left, choose Google Slides.
    3. Give the title your full name + OP05 + Informative Speech (eg. Taro Suzuki OP05 Informative Speech).
    4. Click the Share button and write my Gmail address. (You can continue to make changes after you share.)
    5. Finish your slides before class and be ready to present. Due 10/15 23:59. You can share your slides now and continue working on them until the class.
    6. Practice, practice, practice!
    Your slides should be full slide photographs of your city. The best photographs are your own photographs from your camera or smart phone. If you cannot get your photos yourself, get large photos from Google Images.


    Your slideshow should have at least 8 slides:
    • A title slide with the name of your hometown and your name. (1 slide)
    • An overview slide with your four points (text). (1 slide)
    • One (or more) slides for each point. (4 or more slides)
    • Summary slide with your four points (images). (1 slide)
    • Title slide as your final slide. (1 slide)


    Watch Lisa Suzuki's Informative Speech on the DVD again. Practice with your slides many times to be smooth at it. Practice makes perfect! 

    Download the Google Slides app for your smartphone and log in. Use your smartphone to present next week.


    Your slides should be full-sized slides photographs of your city. The best photographs are your own photographs from your camera or smartphone. If you cannot get your photos yourself, get large (1024x768) photos from Google Images.

    Your slideshow should have at least 8 slides:
    • A title slide with the name of your hometown and your name. (1 slide)
    • An overview slide with your four points (text). (1 slide)
    • One (or more) slides for each point. (4 or more slides)
    • Summary slide with your four points (images). (1 slide)
    • Title slide as your final slide. (1 slide)

    Watch Lisa Suzuki's Informative Speech on the DVD again. Practice with your slides many times to be smooth at it. Practice makes perfect! 

    Wednesday, October 3, 2018

    Lesson 1 – Welcome!

    Welcome to Oral Presentations 05 (Intermediate)!

    Today, I introduced myself and you gave a short introduction speech and learned about presentation posture. Next week, you will give a presentation with the same information using slides.


    First Presentations

    Next week, you will give a short presentation about yourself to the class.

    Tell us about:

    • Your name
    • Your family
    • Your hometown
    • Your interests and/or hobbies (music, sports, activities, school subjects)